Thursday, September 10, 2015

Still Doing Some Woodworking

I haven't done much in the form of woodworking projects lately at least not overly challenging, I have done some work on the house and have made a few more hive parts for our bees. For the house I add a couple of wall in the second floor addition for storage and was able to get the electrician in and the drywall up and a small wall built for a door to the "studio". The door we got is an older used door with 15 pains of glass and lots of old paint that I have been working on stripping, more to follow there.

For the bees I made several new inner covers, bee escapes, queen excluder and a new screened bottom board. Recently I made several new hive bodies (supers) and frames, to get ready for next year. You can see more on the blog we made for this adventure, at Wild Willow Hollow .

Here a couple of pictures of the work done lately.


Store room wall.
New doorway.

Used door, in great shape.

Building for bees.

Sunday, May 17, 2015

Building For Bees

Even though I have been busy working on the house I had to get started on our newest project, and that is bees. We want a couple of hives, only as a hobby, bees are very important to the growth and production of everything around us, so we are doing our part. I could have bought a hive and worked for there to make more brood chambers or honey supers, but as a wood worker I couldn't. We got "Building Beehives for Dummies" and I'm off to the races. It is simple and as long as I follow the directions all will be good, because there is something called "bee space" you have to remember, too much and they fill it with combs, too small and they seal it up with propolis, thus reducing the space they move around in.

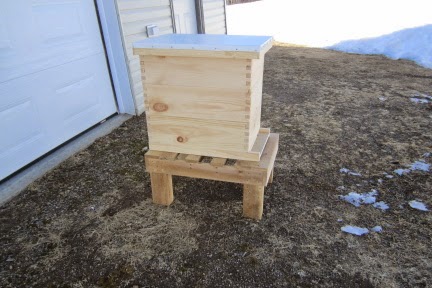
I made the main boxes and frame from pine and the stand from ceder. It is recommended to paint them to help protect the wood so I thought we'd paint them before we sent them out to get our hives started. After all I don't want to be painting with 20,000 bees buzzing about. I made three medium brood chambers (bodies) and have stated making the frames that hold the foundations for the bees to draw out the combs and start making new bees and eventually honey. There will be plenty of work ahead of me making more supers and frames. So as suggested in the book I made an frame assembly jig, to ensure they are the right size and square, and it is a lot easier to assemble in bulk rather then one at a time.

The parts needed to start a hive, bottom board, inner
and outer covers, body and entrance reducer. 

The first brood chamber set up with bottom board, inner
and outer covers with entrance reducer.


The frame assembly jig, knobs hand made.


New frames in the jig.
The frames in the super.
I made handles for two to lift when full of honey.  Like a
french cleat, wedges under the handle and won't slide off.

The three brood chambers and the stand.

Exterior paint, lavender is the color I think. 

Saturday, March 7, 2015

Rug Hooking Frame

With each new project my wife starts there are always new projects for me. This time I made a rug hooking frame. I had a few odd boards of Birdseye maple to use for the frame and base, they look great. The frame is 12 x 12 and pivots on the sides and rotates at the base for more flexibility when working with the piece. My wife ordered gripper strips or hardware clothe depending on whom you talk to and I fastened 10 inch strips to each side with ¾ inch staples. So far she likes it and it is working great.


Still Working With Wood

I'm still working with wood, I just haven't done many projects dedicated to creating with wood, other than building the kitchen cabinets. It has been a long road and there are still a couple of more to do before I can finish off the kitchen, it will get done. You can see the progress of the kitchen and the work I did making the cabinets if you visit my other Blog called "The Searsville Project". There I have posted my work for family and friends from afar to see. Here are a few pictures of the project so far.

The bulk of the project.

Oven and microwave, with 67 inch pull outs
on either side.

The range hood added over the cook top.

Tuesday, February 18, 2014

Quilt Stand

My wife made a quilt to be raffled off in support of the Leukemia and Lymphoma Society,Team in Training,  in which my sister-in-law will be running in, and to display the quilt she needed a stand. I used pine and the posts are fitting into the base for ease of storage and transport. The quilt hangs by a ¼ x 3½ inch board in a sleeve and rests on the the posts in slats at the top. The posts are hollow and light, later I'll put some poly on them to help protect the wood. A quick and easy project that turned out better than she wanted.

Tuesday, January 28, 2014

Shuttles

It has been a while since I made anything that wasn't for the house. These are shuttles for weaving, and I made them for Legacy Lane Fibre Mill, and this is what they do. I used mahogany and with a little glue and screws they should be strong enough to the job and light enough as not to be tire everyone out, as they have to be passed through many many times.

Also some of the wood working I have been doing has been building cupboards, some for appliances and others built-ins. They are from cabinet grade plywood, maple veneer with a 5 layer core, very stable and strong. I have many more to make and will show them off later.

The shuttles.

Some cabinet work.

Wednesday, September 11, 2013

Table Saw Accessories

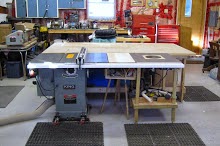
The new shop is up and running, a little tight for now but I can get some work done. You can see how it went on my other blog "The Searsville Project".  The first project I did is this little stand for my table saw accessories, for push sticks, different inserts and fence guards. Before they were piled up on an old three leg round table the was not very sturdy and when ever I used the crank to tilt the blade I would hit my hand. Now it's all safely out of the way and on wheels.

A nice tool trolley.


Fits out of the way.

Everything in it's place.