Saturday, March 13, 2021

New Cabinet

 I finished a new filing/storage cabinet for the office. I needed a couple of more drawers for the things I had in the old desk hutch. I can store my printer paper and other paraphernalia. It has full extension bottom drawers for the files and standard draw slides for the others. I cut in the ends so I can pull the drawers out.  Here is what it looks like. 

Drawers nicely spaces.

A good balance.

How it looked before.

Now with the new cabinet.


Friday, February 19, 2021

Desk Done

 It's finished and in place. the poly coating looks great with the pine, everything went well. I did have to as a little piece of wood under the front left leg to square it up as the house isn't quite square being 120 years old. Now to build the filling cabinet and get the office tidied up. Here is how it looks. 


Monday, February 15, 2021

New Desk

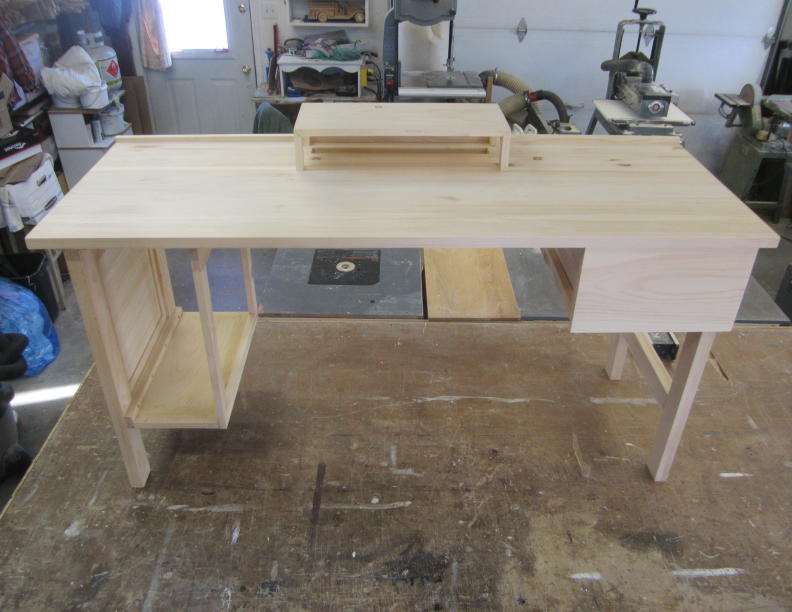
 This past couple of weeks I have been getting lumber dressed to make a new desk, all out of pine. It is an open style desk with one drawer and a place for the old computer tower, which I still use once in a while. The top is a breadboard style, 1 inch think, it turned out great. I have a cut out in the back of the top for wires and a platform for the monitor. I will be putting a plastic holder under the back side to hold the loose wires with a bit of foam to hold them in place. The legs and supports for the drawer and tower are held in place by dovetails. I just slide them in and out for easy assembly. A low edge on the back so I don't accidently pushing anything off. Once I get it finished with clear poly the pine will be nice and light for the office. Shortly I'll be making a new filling cabinet with drawers for odds and ends, as well a for paper for the printer. Here is the desk prior to the finish.


This is the new desk.


Just another angel.

You can see the dovetails to hold the legs in place.

Easily disassembled to move where needed.
ea


Saturday, January 30, 2021

Basement Door

 It's taken a while but it's done, a new basement door. I used some of the lumber left over from the new bed project and I used some of the boards from the old bed frame. It turned out great, such a transformation to the space. Here is a look at how it went, after I made the door, frame and trim in the shop.


Old door, lookin in from the mudroom.

Looking at from the kitchen sink.

No door look.

Not a bad opening.

The door is in.

It looks better just like this.

Nicely trimmed out.


It looks great.

Tuesday, December 29, 2020

New Bed - Completed

 It's done and in place, and it even feel good, we'll see if we get a good nights sleep if it's good or not. I applied two coats of white pickle stain to the main parts and painted the support boards and the slats white. I also rubbed on a polish to help protect it a bit.  It's a much needed improvement over the one I built 24 years ago in an old shed with hand tools and some power tools. I guess it was about time. Here is a before and after look, I still need to make a new end table so more work for me in the shop.  

What we had, a very solid bed frame.

What we have now, also very solid and much brigher.


Tuesday, December 22, 2020

New Bed - Part 2

Over the past few days I have glued up several parts, and now it's done to the pre-paint\stain phase. I added support brackets for the three center rails which are 1½ x 2½. The 14 slats are 3 inches wide and 7/8 thick, plenty of support and it looks great.

Frame assembled and support rails in.

All 14 slats in place.

Another look, and it looks great.


Sunday, December 20, 2020

New Bed

 I can't believe it's been over 3 1/2 years since I made anything worth posting on this site, time for a post. We have been thinking about a new bed for a while, the one we have I made in '96 in an old shed with had tools and some power tools. Things are a bit different today with the shop I have now. I still have some work ahead of me but I wanted to show how things are going. I am using old pine boards I got this fall for a Gentlemen who isn't doing much woodworking anymore and was willing to let these treasures go. I started with rough cut 1 x12 x8 foot long pine boards, I had to dress about 16 of them to find enough clear pine for the head and foot boards, there was a bit of knotty pine in there. So I dressed the lumber, cut to rough dimensions, then to finished dimensions. I had a bit of glue up to do for the headboard, legs, top rails, side rails and support boards for the slats. Oh did I mention this will have slats and only a mattress, no box spring. Here is how it's going, so far.

Here is the rough cut lumber I started with.

After the first run through the planner,
 I got 7 bags of shavings

Cut to size and 4 more bags of shavings.

The legs are glued up, these are the top rails.

Side rails glued up, a little clean up required.

Dry run of the legs and rails.

Mortis attached for the drill press set up.

Footboard dry fit, now to cut the top rail.

Headboard dry fit done.

One more dry fit, it looks great,
now to tapper the legs.